Great day today. I finally received the proper poly V belt (third attempt) and the Hitachi VFD has arrived.
I chose the Hitachi VFD over the other ones out there because it is a well known and reliable brand, plus it has a easy to understand manual. My Huanyang VFD that I use on my CNC router to quite a while to set up – the translation being very poor.
I purchased a the Hitachi WJ200-022SF VFD from DrivesWarehouse for $338 USD, with free shipping. This is a sensorless vector drive that will give me full torque at only 6Hz. This means I will have full torque at about 75rpm – nice, just what I was after.
Because I dont have the extra $1000 to spare, and I am a one man shop, I figured I would use my CNC controller computer and drives for both the RF45 CNC Mill and my CNC Router.
So I made up this handy dany cart for the computer and control box. I can just roll it from one machine to the other, plug in the machine and start Mach with a different profile.
Now I could have made this from 8020, or mild steel, but I chose 1″ square tube aluminum because it looks better and is a bit cheaper. I could have had my good buddy Dave at Moto Trials West who is an excellent specialty welder, but I chose to create some angle plates and use rivets. Why? If you can believe it, I have never really done a project out of rivets and it looks kinda cool, kinda retro airplane look. Aw what the heck.
My plan is to share the CNC Controller between the CNC Router and the RF45 CNC mill. Since the existing controller for the router is Windows XP in a mondo ATX case that is somewhat flakey, I thought it would be a good time for an upgrade.
Requirements
keep costs to a minimum
support pendant
view tool path
handle 500k lines of GCode
touch screen
rugged
Dedicated CNC Controller
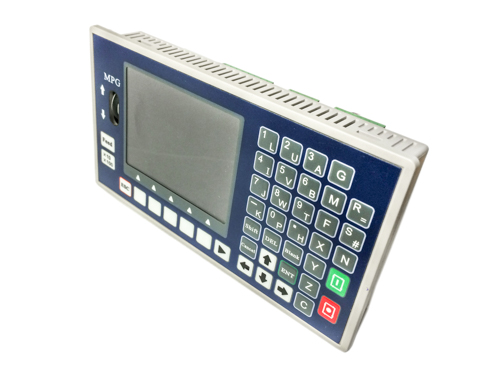
There is a new inexpensive, dedicated CNC controller on the market from China. It does not require any external boards or anything, just connect it right to the Geko drives. BUT, it can only handle 5000 lines of GCode, does not display the toolpath and cannot take a pendant. Too bad, it is somewhat inexpensive.
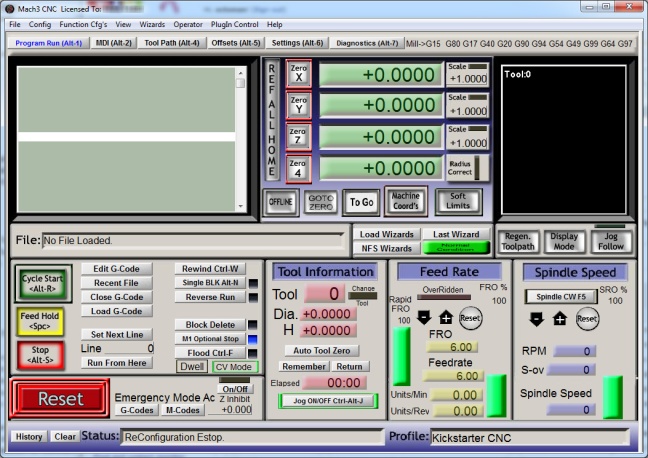
I did contemplate moving to LinuxCNC, because it is free and I can remain current with the software. But since I already know and own a Mach3 license, I am going to stick with Mach. Also Mach3 is still alive and kicking. I did not want to purchase a copy of Mach4 right now – I really don’t see a need for it.
All-In-One Computer
An all-in-one computer with touchscreen is about $500CAD. It will require a hardware motion controller – so another $200-300CAD. I like the idea, but the screens are too big (really?!?!) and perhaps not as rugged as other options.
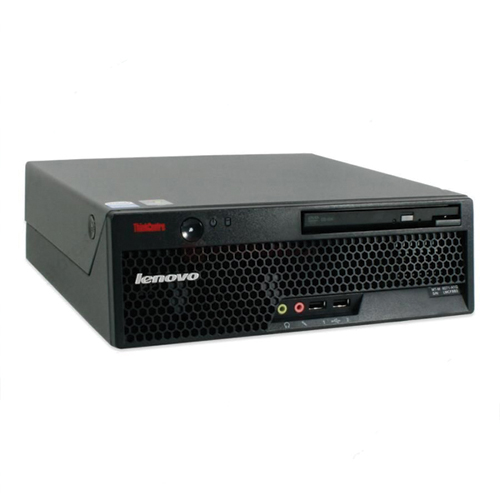
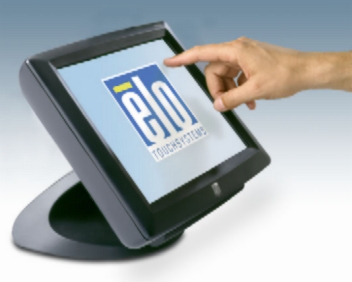
ThinkCenter with ELO Touchscreen
A refurbished Lenovo Thinkcenter with a used ELO touchscreen can be had for under $300 CAD refurbished. Since Mach3 does not require much of a computer, this will work fine. I can probably get a couple of PCIe parallel cards for really cheap or use a hardware motion controller. This is the option I went with as the ELO touchscreen is rugged, the ThinkCenter gets me away from Win XP and the new (old) computer is much more reliable.
Here is a video of my Lenovo ThinkCentre with HP ELO 5007 touch screen. I am also showing off my custom Mach3 screen simplified for my use with the touchscreen.
Part of my Cobra GT Guitar Amp project is a nice faceplate.
The whole faceplate is designed in Corel Draw then exported to DXF. This is brought into Vetrix Cut2D cam software for assigning the toolpaths.
As for the material, I use black anodized aluminum sheet, then cut holes for the controls and engrave labels for each of the controls. Make for a very rugged and professional job.
It all starts with a clean and surfaced spoil board on the CNC. It must be flat with respect to the Z axis, otherwise the engraving will not work out right. Here is a blog posting on surfacing a spoilboard. Why the spoil board? because the holes for the controls are through the material and I do not want to cut into my CNC bed.
Next step is to clean the spoilboard and back of the faceplate material. Then using strong 3M double sided carpet tape, firmly mount the faceplate material to the spoilboard.
Press the faceplate material onto the spoilboard using a J Roller, to make sure the tape has firmly bonded.
I use two engraving tips. A 0.010″ for the regular labelling and a 0.020″ for the large letters. These are simply 1/8″ HSS bit precision ground .
Here is an action shot of the 0.010″ bit…
Here is the engraving completed…
Final cuts with the 0.250″ aluminum router bit from Belin Y
Getting the spoil board ready for engraving a faceplate for a guitar amplifier. Because the engraving is only a few thou deep, the spoilboard must be as flat as possible with respect to the Z axis of the CNC Router.
I use this 1-1/2″ bottom cleaning bit from Grizzly – because I can run it at 12,000RPM.
Here is the spoilboard mounted on the CNC Router. Anchor screws are recessed.