I hated the adjustable feet I put on my RF45 mill. When sitting on the stock stand, there is WAY too much movement. Well forget that!
I decided to fill the whole darn thing with cement, and bolt it to the floor. Works like a charm. Solid as a rock.


I hated the adjustable feet I put on my RF45 mill. When sitting on the stock stand, there is WAY too much movement. Well forget that!
I decided to fill the whole darn thing with cement, and bolt it to the floor. Works like a charm. Solid as a rock.

Rivnuts are great. Except for the cost of the installation tool.
However, a DIY tool can be made pretty darn easily.


You are done! Even with steel rivnuts, it does not take a lot of effort.

Typical inexpensive Chinese products. Good in some respects, a little poor in others. When it comes to machinery often the component needs to be disassembled and adjusted.
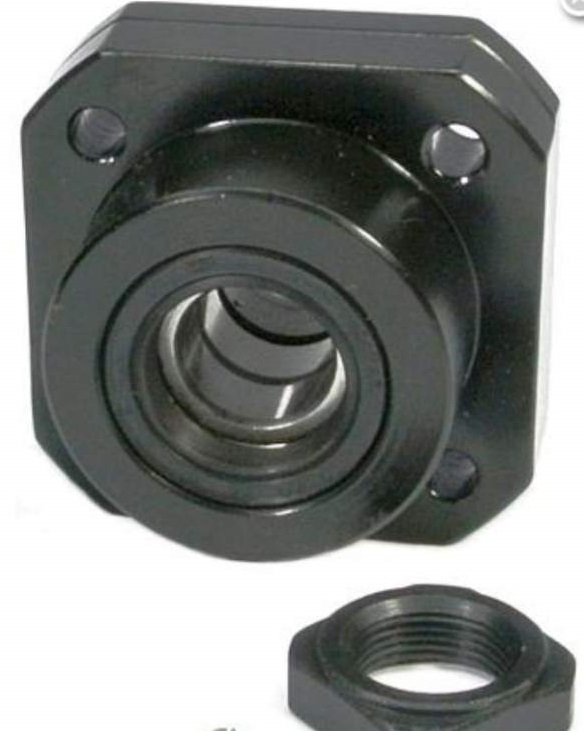
The FK15 bearings I purchased for my RF45 Mill CNC are no different.
When I assembled the mill, I had too much backlash on the Y axis. It took a while to find it, but I chased it down to the fixed end bearings. After tearing down the assembly, I noticed a few things:
(1) The angular contact bearings were mounted in tandem (both facing the same way). This is no good for a lead screw because the lead screws on a CNC typically move two ways on a CNC.
(2) Lack of grease. The bearings are oiled, but no grease. This is *not* suitable for a CNC unless you have an oil line to these bearings (which I highly doubt)
(3) Unable to apply preload. The AC bearings are stacked together, but unable to apply any preload because the inner and outer races are in contact with each other. A shim is required on the outer races in order to apply preload. I made a 0.025″ shims on the outer race and placed the bearing back to back.
Once I did the above, the fixed bearings worked fine.

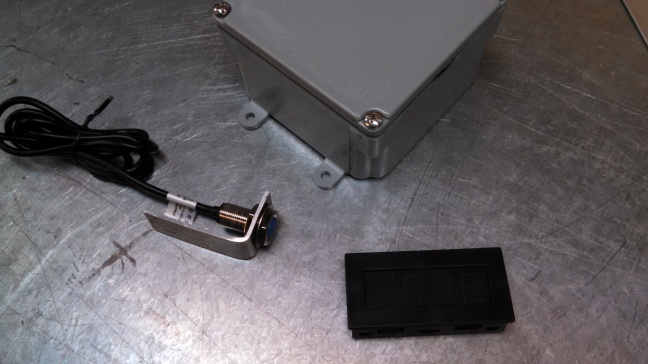
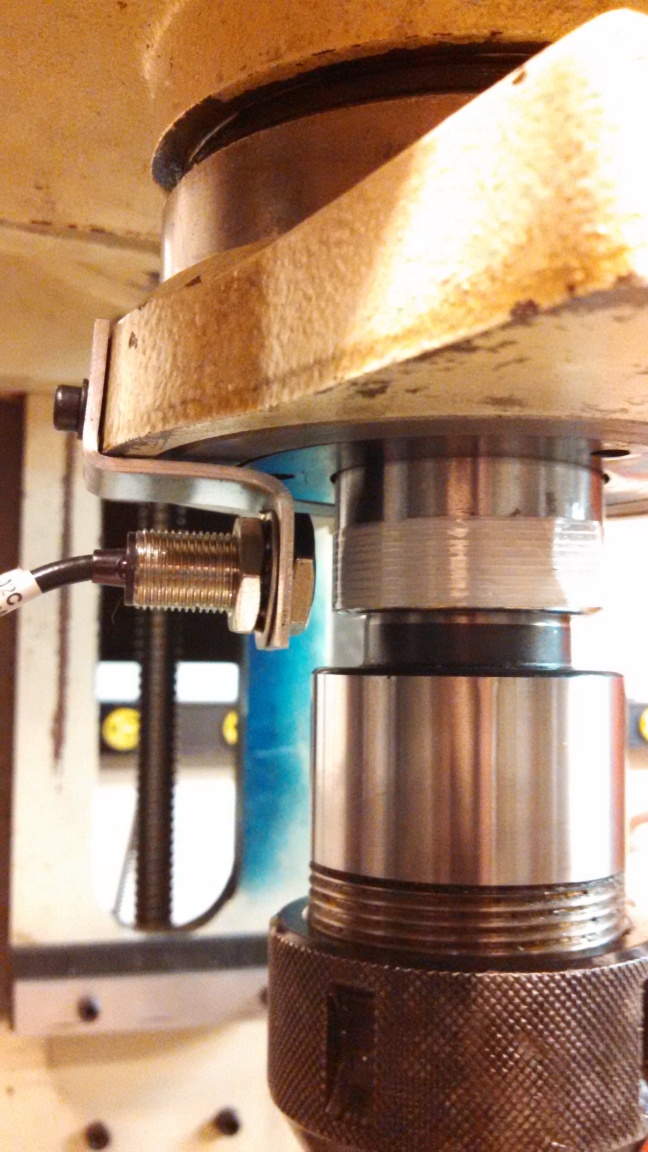
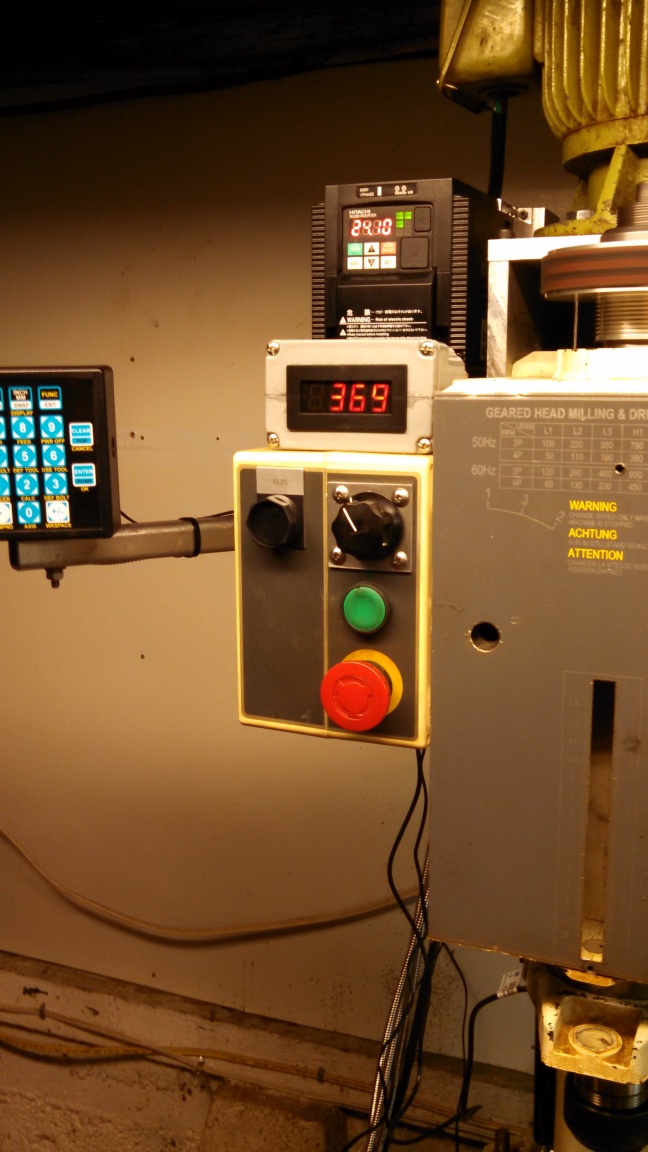
The VFD is nice, but it only displays frequency, not spindle RPM (which would be wrong anyways because of the belt pulley ratio can change).
From eBay I picked up a LED tach display with Hall effect proximity switch. I mounted in a plastic case. A little bracket for the pickup unit and 12V adapter completed the picture.
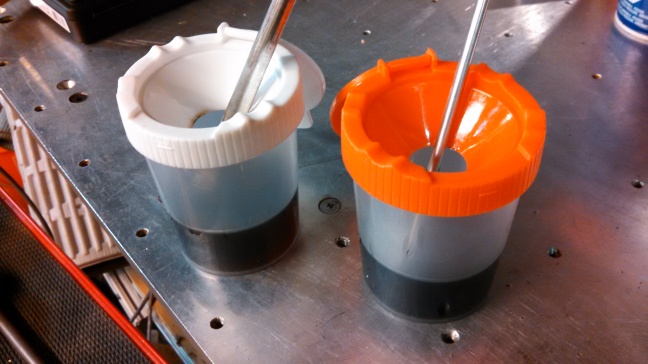 Here is some sweet little containers that can be used for cutting oil. They are spill proof and little top funnels that allow the cutting fluid to drop back in the container.
Toss in a few rare earth magnets to keep the containers stuck to your splash pan or mill top.


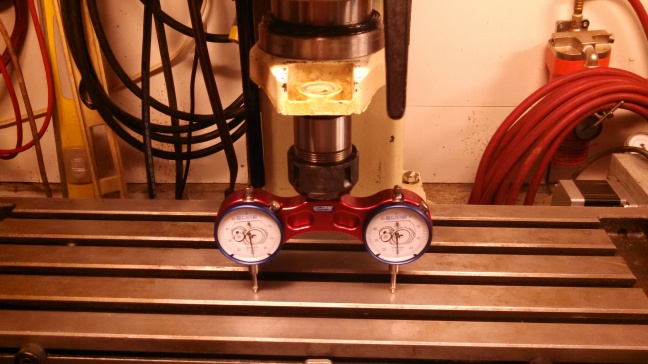
Since I removed the column from my RF45 Mill and removed the head I will need to tram the mill in both the Z-X and Z-Y planes. I tried squaring up the mill column with a square, but not much luck getting it precise – so tramming is the best option.
In googling around for RF45 mill tramming, I stumbled across the Pro Tram System from Edge Technology. I figured for $100 I could give it a go.
I love it.
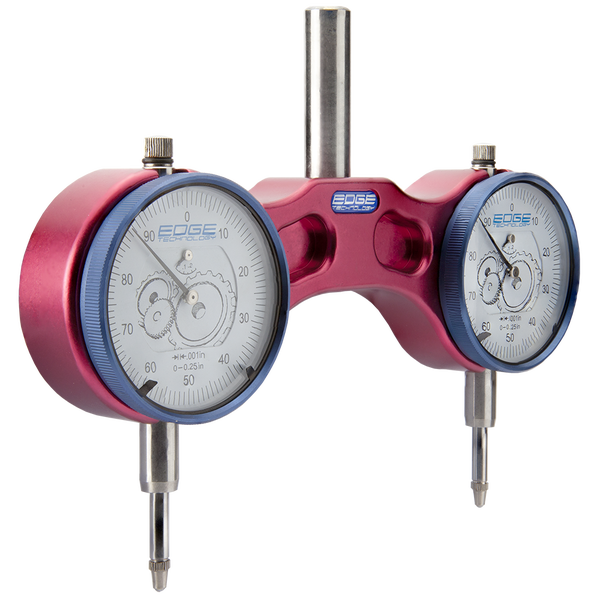
This is such a simple method for tramming the mill. Just calibrate it, then rotate it in Z-X or Z-Y axis and adjust until the dial indicators read the same. Easy Peasy. See the video below.

Here are a lot of little small tips that came in useful when setting up the Hitachi WJ200 VFD.
You cannot enter specific motor parameters without unlocking them first. Go to B037 and set it to “00”.
If your motor is running backwards swap two leads on the motor.
To use the panel to set the VFD speed you must be editing F001, then use the up and down keys.
The drive initially comes set as constant torque. Before adjusting any torque settings try using the drive as is. If more torque is required, then adjust settings.
If your motor has too much whine, adjust the carrier frequency B083. Try with 5Khz, and if that does not fix it, try 6kHz.
To stop the motor quickly, try reducing the deceleration to 2-3 seconds. If this trips the VFD or is not stopping fast enough, you will need a braking resistor.
Use a 1K 2W linear pot for speed control. This is connected to H, L and O connectors on the VFD. The H connector goes to the LOW side of the pot, and the L connector goes to the HIGH side of the pot (yep, its backwards). O goes to the wiper. To use the external speed control, you must set parameter A001 to 00. Pages 3-12 and 4-6.
To use an external run stop switch, it cannot be a momentary switch. First of all you must connect the jumper L to PLC. Then you use a switch between P24 to 1 (FWD). Turn the switch on, it runs the motor, turn the switch off, the motor stops. You must modify parameter A002 to 01 to enable using an external switch. Page 4-16
Set the max frequency by using A004.
Set the deceleration time by F003 parameter (in seconds)

Great day today. I finally received the proper poly V belt (third attempt) and the Hitachi VFD has arrived.
I chose the Hitachi VFD over the other ones out there because it is a well known and reliable brand, plus it has a easy to understand manual. My Huanyang VFD that I use on my CNC router to quite a while to set up – the translation being very poor.
I purchased a the Hitachi WJ200-022SF VFD from DrivesWarehouse for $338 USD, with free shipping. This is a sensorless vector drive that will give me full torque at only 6Hz. This means I will have full torque at about 75rpm – nice, just what I was after.


Because I dont have the extra $1000 to spare, and I am a one man shop, I figured I would use my CNC controller computer and drives for both the RF45 CNC Mill and my CNC Router.
So I made up this handy dany cart for the computer and control box. I can just roll it from one machine to the other, plug in the machine and start Mach with a different profile.


Now I could have made this from 8020, or mild steel, but I chose 1″ square tube aluminum because it looks better and is a bit cheaper. I could have had my good buddy Dave at Moto Trials West who is an excellent specialty welder, but I chose to create some angle plates and use rivets. Why? If you can believe it, I have never really done a project out of rivets and it looks kinda cool, kinda retro airplane look. Aw what the heck.
Anyways, it all worked out well.

X, Y, Z steppers and pulleys mounted. Spindle bearings upgraded and installed. Head installed. Starting to look like a mill again.


