Windows Laptop or Tablet – or Laplet?

I have too much computer technology:

  • 10″ android tablet
  • 7″ android tablet
  • 15″ windows laptop
  • A bunch of android phones

I use the phone and the laptop a lot.  BUT the laptop is just a bit too clunky for travel. So….   enter the Windows Laplet.

I want a windows device, because I have some particular apps I want to run that are only available under windows.  Also I am very well versed in c# and .Net, so its easy for me to write for this platform.

I ended up buying a Lenovo MIIx 300 Windows tablet with keyboard docking station.  Basically it is a Windows Netbook with a removeable laptop.


Pros

  • Its windows
  • It can sit on my lap without tipping over
  • Its small 10.1″
  • Lots of goof reviews for reliability
  • Remote desktop works just fine

Cons

  • The keyboard is “compressed”, and I do make a lot of mistakes
  • 2GB of ram is not a heck of a lot

Anyways, it will be just fine for travel.Movies, internet, facebook, trello and remote desktop.
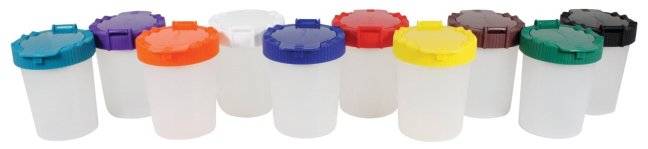
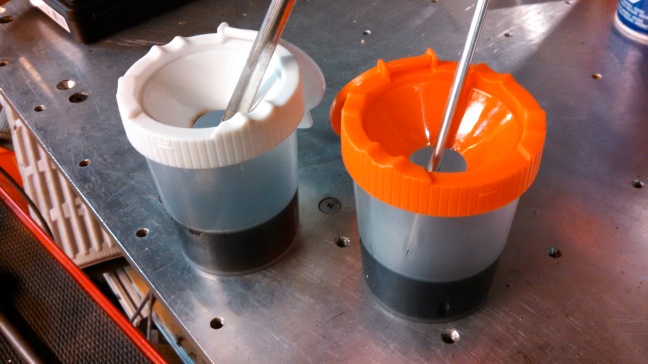


Concrete Stand for RF45 Mill

I hated the adjustable feet I put on my RF45 mill. When sitting on the stock stand,  there is WAY too much movement.  Well forget that!

I decided to fill the whole darn thing with cement, and bolt it to the floor.  Works like a charm.  Solid as a rock.

DIY Homemade Rivnut Tool

Rivnuts are great.  Except for the cost of the installation tool.

However, a DIY tool can be made pretty darn easily.


Here is what you need

  1. A bolt that fits your steel Rivnut that is about 2″ long
  2. A nut that fits the bolt.
  3. A piece of 1/8″ flatbar steel 1″ x 8″.

160224-IMG_20160224_185648_497

A little bit of prep work

  1. In the steel, drill a hole in the end the same size as the bolt.
  2. On the nut, grind or scratch a mark point

How to assemble it

  1. Drill the hole for the rivnut and insert it into the sheet metal.
  2. Put the nut on the bolt
  3. Place the piece of steel over the bolt
  4. Screw it into the assembly into the rivnut
  5. Snug it up so that the bolt is through the rivnut, then the nut snugs up the steel to the rivnut

160224-IMG_20160224_185742_848

How to tighten it all together

  1. Put a wrench on the bolt, hold it fixed with the steel.
  2. Put another wrench on the nut, start to tighten it
  3. Tighten the nut three revolution (using the mark point)

160224-IMG_20160224_185838_163

You are done!   Even with steel rivnuts, it does not take a lot of effort.


Sprinter Transmission Temp Sensor

Srpinter transmission temp cannot be read with a typical ODB tool, but can be read by tapping into a wire into the TCM and reading the voltage.

The TCM is located under the drivers seat.  On connector C2, tap into the Pin 34 which is the Grey wire with a blue stripe.  Put a volt meter on this wire, and another on ground and read the voltages.

Use the table below to translate the voltage to transmission temp.


sprinter TCM

TCM Transmission Connector

160221-IMG_20160221_115921_861

Chinese Ball Screw Bearing Mounts

Typical inexpensive Chinese products.  Good in some respects, a little poor in others.  When it comes to machinery often the component needs to be disassembled and adjusted.

The FK15 bearings I purchased for my RF45 Mill CNC are no different.

When I assembled the mill, I had too much backlash on the Y axis.  It took a while to find it, but I chased it down to the fixed end bearings.  After tearing down the assembly, I noticed a few things:

(1)  The angular contact bearings were mounted in tandem (both facing the same way).  This is no good for a lead screw because the lead screws on a CNC typically move two ways on a CNC.

(2) Lack of grease.  The bearings are oiled, but no grease.  This is *not* suitable for a CNC unless you have an oil line to these bearings (which I highly doubt)

(3) Unable to apply preload.  The AC bearings are stacked together, but unable to apply any preload because the inner and outer races are in contact with each other.  A shim is required on the outer races in order to apply preload.  I made a 0.025″ shims on the outer race and placed the bearing back to back.

Once I did the above, the fixed bearings worked fine.


fk152


Mill Tramming

Since I removed the column from my RF45 Mill and removed the head I will need to tram the mill in both the Z-X and Z-Y planes.  I tried squaring up the mill column with a square, but not much luck getting it precise – so tramming is the best option.

In googling around for RF45 mill tramming, I stumbled across the Pro Tram System from Edge Technology.   I figured for $100 I could give it a go.

I love it.

pre edge tramming

This is such a simple method for tramming the mill.  Just calibrate it, then rotate it in Z-X or Z-Y axis and adjust until the dial indicators read the same.  Easy Peasy.  See the video below.

160101-IMG_20160101_174841_647


Setting Up Hitachi WJ200 VFD

Here are a lot of little small tips that came in useful when setting up the Hitachi WJ200 VFD.

Unlock Config Parameters

You cannot enter specific motor parameters without unlocking them first.  Go to B037 and set it to “00”.

Rotation Direction (Running Backwards)

If your motor is running backwards swap two leads on the motor.

Using the Panel to Set the Speed

To use the panel to set the VFD speed you must be editing F001, then use the up and down keys.

Constant Torque/Variable Torque/Sensorless Vector

The drive initially comes set as constant torque.  Before adjusting any torque settings try using the drive as is.  If more torque is required, then adjust settings.

Whiny Motor

If your motor has too much whine, adjust the carrier frequency  B083.  Try with 5Khz, and if that does not fix it, try 6kHz.

Stopping Quickly

To stop the motor quickly, try reducing the deceleration to 2-3 seconds.  If this trips the VFD or is not stopping fast enough, you will need a braking resistor.

Speed Control Potentiometer (Pot)

Use a 1K 2W linear pot for speed control.  This is connected to H, L and O connectors on the VFD.  The H connector goes to the LOW side of the pot, and the L connector goes to the HIGH side of the pot (yep, its backwards).  O goes to the wiper.  To use the external speed control, you must set parameter A001 to 00.  Pages 3-12 and 4-6.

External Run/Stop Switch

To use an external run stop switch, it cannot be a momentary switch.  First of all you must connect the jumper L to PLC.  Then you use a switch between P24 to 1 (FWD).  Turn the switch on, it runs the motor, turn the switch off, the motor stops.  You must modify parameter A002 to 01 to enable using an external switch.  Page 4-16


Running the Motor at 120Hz

Set the max frequency by using A004.

Deceleration Time

Set the deceleration time by F003 parameter (in seconds)


RF45 CNC – Motor and VFD Mounted

Great day today.  I finally received the proper poly V belt (third attempt) and the Hitachi VFD has arrived.

I chose the Hitachi VFD over the other ones out there because it is a well known and reliable brand, plus it has a easy to understand manual.  My Huanyang VFD that I use on my CNC router to quite a while to set up – the translation being very poor.

I purchased a the Hitachi WJ200-022SF VFD from DrivesWarehouse for $338 USD, with free shipping.  This is a sensorless vector drive that will give me full torque at only 6Hz.  This means I will have full torque at about 75rpm – nice, just what I was after.