Mill Tach

The VFD is nice, but it only displays frequency, not  spindle RPM (which would be wrong anyways because of the belt pulley ratio can change).

From eBay I picked up a LED tach display with Hall effect proximity switch.  I mounted in a plastic case.  A little bracket for the pickup unit and 12V adapter completed the picture.

160118-IMG_20160118_164316_437160118-IMG_20160118_164346_235

160118-IMG_20160118_164147_235

Setting Up Hitachi WJ200 VFD

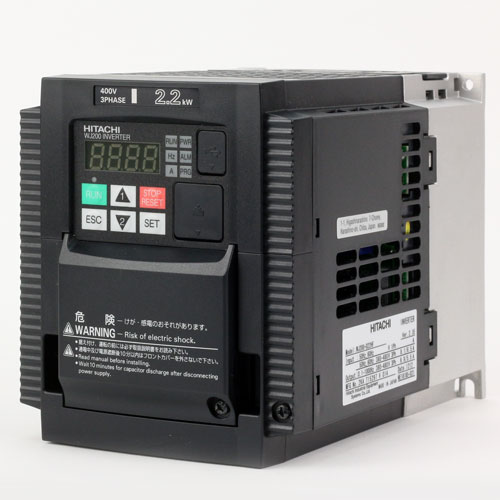
Here are a lot of little small tips that came in useful when setting up the Hitachi WJ200 VFD.

Unlock Config Parameters

You cannot enter specific motor parameters without unlocking them first.  Go to B037 and set it to “00”.

Rotation Direction (Running Backwards)

If your motor is running backwards swap two leads on the motor.

Using the Panel to Set the Speed

To use the panel to set the VFD speed you must be editing F001, then use the up and down keys.

Constant Torque/Variable Torque/Sensorless Vector

The drive initially comes set as constant torque.  Before adjusting any torque settings try using the drive as is.  If more torque is required, then adjust settings.

Whiny Motor

If your motor has too much whine, adjust the carrier frequency  B083.  Try with 5Khz, and if that does not fix it, try 6kHz.

Stopping Quickly

To stop the motor quickly, try reducing the deceleration to 2-3 seconds.  If this trips the VFD or is not stopping fast enough, you will need a braking resistor.

Speed Control Potentiometer (Pot)

Use a 1K 2W linear pot for speed control.  This is connected to H, L and O connectors on the VFD.  The H connector goes to the LOW side of the pot, and the L connector goes to the HIGH side of the pot (yep, its backwards).  O goes to the wiper.  To use the external speed control, you must set parameter A001 to 00.  Pages 3-12 and 4-6.

External Run/Stop Switch

To use an external run stop switch, it cannot be a momentary switch.  First of all you must connect the jumper L to PLC.  Then you use a switch between P24 to 1 (FWD).  Turn the switch on, it runs the motor, turn the switch off, the motor stops.  You must modify parameter A002 to 01 to enable using an external switch.  Page 4-16


Running the Motor at 120Hz

Set the max frequency by using A004.

Deceleration Time

Set the deceleration time by F003 parameter (in seconds)


RF45 CNC – Motor and VFD Mounted

Great day today.  I finally received the proper poly V belt (third attempt) and the Hitachi VFD has arrived.

I chose the Hitachi VFD over the other ones out there because it is a well known and reliable brand, plus it has a easy to understand manual.  My Huanyang VFD that I use on my CNC router to quite a while to set up – the translation being very poor.

I purchased a the Hitachi WJ200-022SF VFD from DrivesWarehouse for $338 USD, with free shipping.  This is a sensorless vector drive that will give me full torque at only 6Hz.  This means I will have full torque at about 75rpm – nice, just what I was after.

Spindle Grease

My angular contact bearings cost me well over $500.  Since it wont be easy to lubricate them, I will be using some kind of grease.

Well, like every oil thread out there, lots of opinions abound.  Here is the most popular:

  • Kluber Isoflex NBU-15
  • DOW Molykote G-2001
  • DOW BG-20 and BG-555 Synthetic
  • Mobil SHC 32

Here are the Mobil and DOW product manuals.

https://www.dowcorning.com/content/publishedlit/80-3256.pdf
http://www.mobilindustrial.com/ind/english/files/sc_grease.pdf

The winner?  Kluber.  Why?  Most everyone either loves it or will argue against it because it is too expensive. But really, I am only lubricating two bearings, perhaps once every year or two.

RF45 VFD Conversion – Mill Head Spindle

In order for a pulley to be mounted on the RF45 spindle, a bit of work had to take place:

  1. the spindle needed to be lengthened to accommodate a pulley
  2. a key way cut
  3. a spacer needed to be machined
  4. the shaft needed to be threaded for a bearing retaining nut

Here are some pics.

The original hollow shaft.

IMG_2166

New extension welded on and ground

150928-IMG_20150928_064421_597

Roughed to size for threads, then finished with vertical shear tool

151103-IMG_20151103_172650_753 151103-IMG_20151103_172701_428

Threaded

151103-IMG_20151103_175757_907 151103-IMG_20151103_175816_109

Ready for assembly with sleeve and N-08 bearing retaining nut.  Sorry no pictures of making the sleeve.  I made it from a section of 3″ round mild steel stock.  It is bored about 1 thou over so it slides on and off easily.

151103-IMG_20151103_180402_133

RF45 VFD Conversion – Pulleys

As part of my Rung Fu Mill RF45 conversion to Variable Frequency Drive, I need to make a couple of two stage pulleys that use poly V belts.  These pulleys will allow me to get the full range of RPM from bull low to 6000RPM.

151008-IMG_20151008_140151_885

The spec for the Poly V belts is quite specific.  I had to grind a specific 80 degree HSS bit.  A separation of .092″ and a depth (in radius) of .080″.  I did a lot of practising to get the feel and RPM right.

IMG_2173

The pulleys were made from a block of aluminum.  Here is my process:

  1. Round to OD of large pulley
  2. Face
  3. Round step to OD of small pulley
  4. To make sure both pulleys line up properly, I had to be very specific with cutting the V grooves:
  5. Starting 10 thou from the step cut the V grooves for the small pulley – move away from headstock
  6. Starting 10 thou from the step cut the V grooves for the large pulley – move towards the headstock
  7. Bore the shaft hole (1 thou under for shrink fit)
  8. Cut keyway
  9. Use bandsaw to cut back off pulley
  10. Face large pulley side
  11. On motor pulley drill and tap set screws

151009-IMG_20151009_174447_657 151009-IMG_20151009_181442_334    151008-IMG_20151008_111524_322 151008-IMG_20151008_131431_059 151008-IMG_20151008_134155_248 151104-IMG_20151104_185551_986151008-IMG_20151008_140035_045  151107-IMG_20151107_122057_418