Windows Laptop or Tablet – or Laplet?

I have too much computer technology:

  • 10″ android tablet
  • 7″ android tablet
  • 15″ windows laptop
  • A bunch of android phones

I use the phone and the laptop a lot.  BUT the laptop is just a bit too clunky for travel. So….   enter the Windows Laplet.

I want a windows device, because I have some particular apps I want to run that are only available under windows.  Also I am very well versed in c# and .Net, so its easy for me to write for this platform.

I ended up buying a Lenovo MIIx 300 Windows tablet with keyboard docking station.  Basically it is a Windows Netbook with a removeable laptop.


Pros

  • Its windows
  • It can sit on my lap without tipping over
  • Its small 10.1″
  • Lots of goof reviews for reliability
  • Remote desktop works just fine

Cons

  • The keyboard is “compressed”, and I do make a lot of mistakes
  • 2GB of ram is not a heck of a lot

Anyways, it will be just fine for travel.Movies, internet, facebook, trello and remote desktop.


Concrete Stand for RF45 Mill

I hated the adjustable feet I put on my RF45 mill. When sitting on the stock stand,  there is WAY too much movement.  Well forget that!

I decided to fill the whole darn thing with cement, and bolt it to the floor.  Works like a charm.  Solid as a rock.

DIY Homemade Rivnut Tool

Rivnuts are great.  Except for the cost of the installation tool.

However, a DIY tool can be made pretty darn easily.


Here is what you need

  1. A bolt that fits your steel Rivnut that is about 2″ long
  2. A nut that fits the bolt.
  3. A piece of 1/8″ flatbar steel 1″ x 8″.

160224-IMG_20160224_185648_497

A little bit of prep work

  1. In the steel, drill a hole in the end the same size as the bolt.
  2. On the nut, grind or scratch a mark point

How to assemble it

  1. Drill the hole for the rivnut and insert it into the sheet metal.
  2. Put the nut on the bolt
  3. Place the piece of steel over the bolt
  4. Screw it into the assembly into the rivnut
  5. Snug it up so that the bolt is through the rivnut, then the nut snugs up the steel to the rivnut

160224-IMG_20160224_185742_848

How to tighten it all together

  1. Put a wrench on the bolt, hold it fixed with the steel.
  2. Put another wrench on the nut, start to tighten it
  3. Tighten the nut three revolution (using the mark point)

160224-IMG_20160224_185838_163

You are done!   Even with steel rivnuts, it does not take a lot of effort.


Chinese Ball Screw Bearing Mounts

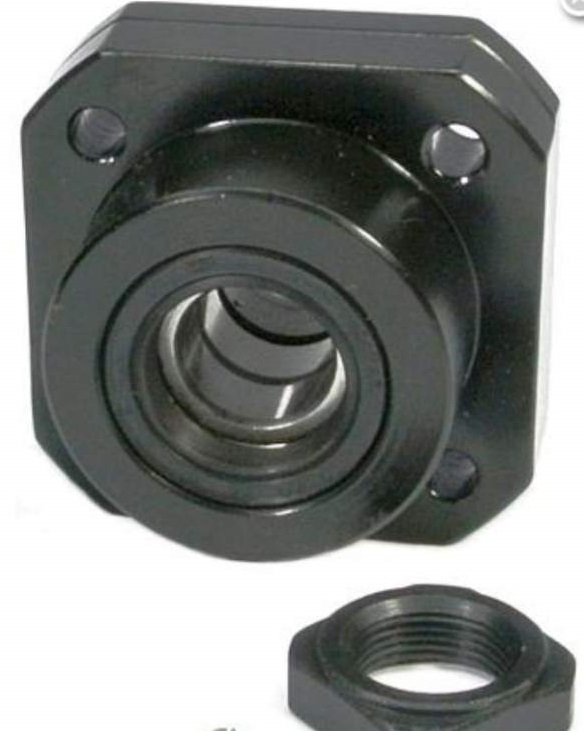
Typical inexpensive Chinese products.  Good in some respects, a little poor in others.  When it comes to machinery often the component needs to be disassembled and adjusted.

The FK15 bearings I purchased for my RF45 Mill CNC are no different.

When I assembled the mill, I had too much backlash on the Y axis.  It took a while to find it, but I chased it down to the fixed end bearings.  After tearing down the assembly, I noticed a few things:

(1)  The angular contact bearings were mounted in tandem (both facing the same way).  This is no good for a lead screw because the lead screws on a CNC typically move two ways on a CNC.

(2) Lack of grease.  The bearings are oiled, but no grease.  This is *not* suitable for a CNC unless you have an oil line to these bearings (which I highly doubt)

(3) Unable to apply preload.  The AC bearings are stacked together, but unable to apply any preload because the inner and outer races are in contact with each other.  A shim is required on the outer races in order to apply preload.  I made a 0.025″ shims on the outer race and placed the bearing back to back.

Once I did the above, the fixed bearings worked fine.


fk152


Mill Tramming

Since I removed the column from my RF45 Mill and removed the head I will need to tram the mill in both the Z-X and Z-Y planes.  I tried squaring up the mill column with a square, but not much luck getting it precise – so tramming is the best option.

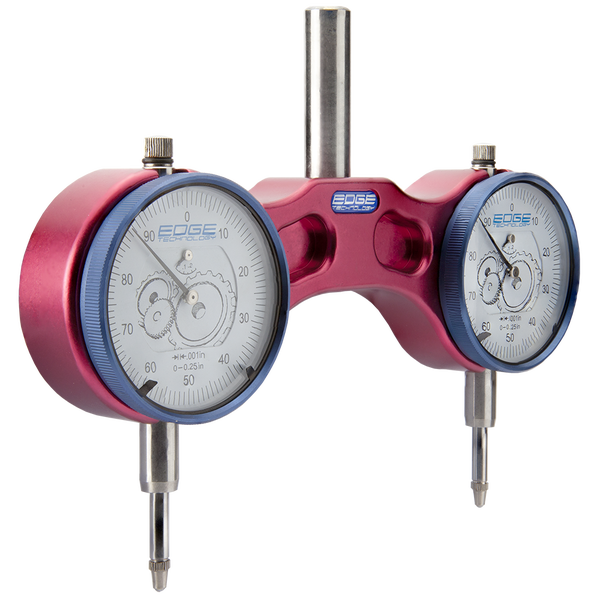
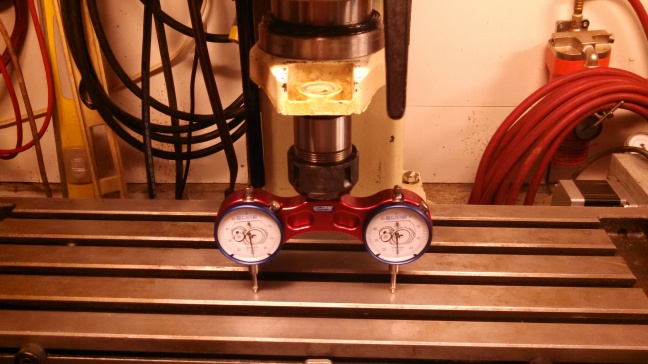
In googling around for RF45 mill tramming, I stumbled across the Pro Tram System from Edge Technology.   I figured for $100 I could give it a go.

I love it.

pre edge tramming

This is such a simple method for tramming the mill.  Just calibrate it, then rotate it in Z-X or Z-Y axis and adjust until the dial indicators read the same.  Easy Peasy.  See the video below.

160101-IMG_20160101_174841_647


RF45 CNC – Motor and VFD Mounted

Great day today.  I finally received the proper poly V belt (third attempt) and the Hitachi VFD has arrived.

I chose the Hitachi VFD over the other ones out there because it is a well known and reliable brand, plus it has a easy to understand manual.  My Huanyang VFD that I use on my CNC router to quite a while to set up – the translation being very poor.

I purchased a the Hitachi WJ200-022SF VFD from DrivesWarehouse for $338 USD, with free shipping.  This is a sensorless vector drive that will give me full torque at only 6Hz.  This means I will have full torque at about 75rpm – nice, just what I was after.

CNC Controller Cart

Because I dont have the extra $1000 to spare, and I am a one man shop, I figured I would use my CNC controller computer and drives for both the RF45 CNC Mill and my CNC Router.

So I made up this handy dany cart for the computer and control box.  I can just roll it from one machine to the other, plug in the machine and start Mach with a different profile.


Now I could have made this from 8020, or mild steel, but I chose 1″ square tube aluminum because it looks better and is a bit cheaper. I could have had my good buddy Dave at Moto Trials West who is an excellent specialty welder, but I chose to create some angle plates and use rivets.  Why?  If you can believe it, I have never really done a project out of rivets and it looks kinda cool, kinda retro airplane look.  Aw what the heck.

Anyways, it all worked out well.

Timing Belt Pulley/Belt Calculations

For the RF45 CNC conversion a lot goes into determining the timing belt pulleys.  The two major factors I am considering are:

  • precision of axis movement
  • speed of rapids

Precision of Movement

For the mill, I am wanting 0.001″ precision (+/- 5/10ths). So first step (pun intended) is to make sure my steppers increment below this about by a factor of at least 3 or 4.   My ballscrew threads are 5TPI, and motors are 200 steps per inch.  5 revolutions (5*200 = 1000 steps) will give me 1 inch. That means 1 step will be 0.001″.  Not good enough.

I need stepper pulleys to be at least 3:1 or 4:1 ratio.

B&B Manufacturing has a great timing belt calculator

4:1 too difficult to achieve

Using the calculator, it became obvious really quick that a 4:1 ratio would require a large seperation of pulleys to maintain a minimum of 6 teeth on the smaller pulley.  So it will have to be 3:1.

Sizing Pulleys and Selecting Belts

Since I will be ordering pulleys and belts from  McMaster.  I would use the calculator to select pulleys that were available at McMaster.  Then enter a starting center distance find a belt that would be available.  Eventually arriving at a desired pulleys and belt.

Speed of Rapids

My CNC controller computer uses parallel ports, which can output pulses reliably at 100kHz. My motors are 200 steps/rev.  Ballscrews are 5TPI. Pulley ratio is 3:1.

  • 100kHz  Pulses is 6,000k pulses/min.
  • To move the axis 1″ will take 5 revolutions of the ballscrew
  • To rotate the ballscrew 1 rev takes 3 *200 steps

So, it takes 3*200*5 = 3000 pulses to move the axis 1 inch. 6,000k / 3k = 2000 IPM.  Ahh, errr  rapids are not a problem.


Sears Kenmore Elite Dryer Wont Run

Kenmore Elite HE3 Limited Edition, perhaps 10 years old.  Whirlpool OEM.   Model number 110.C83902202

Symptoms

Close door, press Jeans (or any other mode), control panel lights, press start, a relay clicks and nothing happens.

Diagnosis

  1.  Power to dryer – AOK as front control panel lightcomputer
  2. Door switch – AOK. Try starting dryer with door open, control panel will beep three times.  With door closed, control panel does not beep.
  3. Start Switch – AOK.  When I press and hold the start switch a relay clicks.
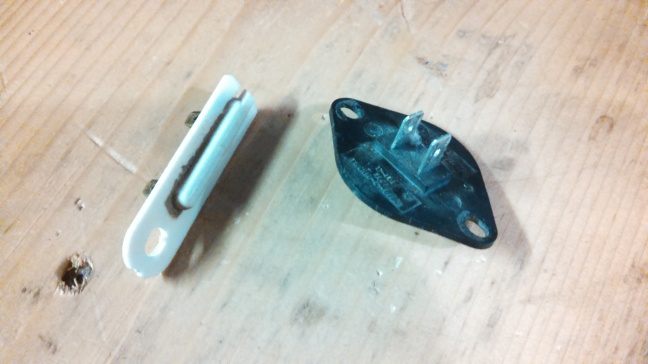
  4. Thermal Fuse – hmm, I will have to tear down the machine to test this.
  5. Broken belt or belt switch.  – Had this happen before. I will have to tear is down to find out.
  6. Shorted/Burnt wiring – often near the terminal block (poor connection) – will have to check
  7. Bad Motor – often accompanied by a loud buzzing sound (start cap,) mine does not make this noise, but will have to check.
  8. Timer failure – will have to check
  9. Computer board


Took off the top panel and dug out the instructions.  Went through the diagnostics.  When pressing START in diagnostic mode, the dryer would not start and a 06 would flash.  Could not find what this code meant.

Removed the kick panel, tested the thermal fuse. BINGO – open circuit.


151129-IMG_20151129_122253_467

151129-IMG_20151129_122449_101


Oiling the X Axis Ball Nut on the RF45


The Y and X axis ballnuts are easily reachable by a hand pump to keep them nice and lubricated.  I might even upgrade these to a one shot system, sometime in the future, but for now a had pump is simple and easy.

But the X axis nut is buried under the table in a very cramped location.  I tried to put in a hard line, then a softline but both interfered with the table (the above image show the first attemp).  What I needed was a very small elbow with a 1/8″ compression fitting at one end and a 6mm thread on the other.  No way McMaster had one of these, so I made one up myself.

I took a piece of 10mm steel rod.  Turned down an end to 6mm.  Drilled in a 2mm hole for the oil.  Threaded the end.  At 90 degrees, drilled a 1/8″ hole for the hard line, then lopped off the end.  Had to do a bit of filing to keep the clearance low.